Showing posts with label diy. Show all posts
Monday, August 10, 2015
Tuesday, February 17, 2015
Friday, February 13, 2015
Tuesday, January 27, 2015
Friday, January 9, 2015
Wednesday, April 2, 2014
Friday, February 14, 2014
Valentine's day
Amazing ideas for valentine's day spirit from the blog "A beautiful mess"
see them all here:
20 homamade Valentine's ideas
see them all here:
20 homamade Valentine's ideas
Labels:
blogging,
craft,
diy,
holidays,
valentine's day
Thursday, February 6, 2014
8 home project
Cool 8 home diy project from poppytalk. Here some of them:
You can see all here:
http://www.poppytalk.com/2013/10/8-home-decor-projects-to-try.html
You can see all here:
http://www.poppytalk.com/2013/10/8-home-decor-projects-to-try.html
Tuesday, December 31, 2013
Thursday, November 28, 2013
Saturday, October 12, 2013
Sunday, September 15, 2013
Turn Photos into Paper Flowers
Turn Photos into Paper Flowers:
See the tutorial for DIY paper flower with photo here: turn-photos-into-paper-flowers
Friday, August 16, 2013
Thursday, June 6, 2013
Photo wrapping paper DIY
Gifts can be really creative if you want to be.
Here is some amazing idea about photo wrapping paper and tutorial how to do it yourself:
Wednesday, June 5, 2013
Friday, April 19, 2013
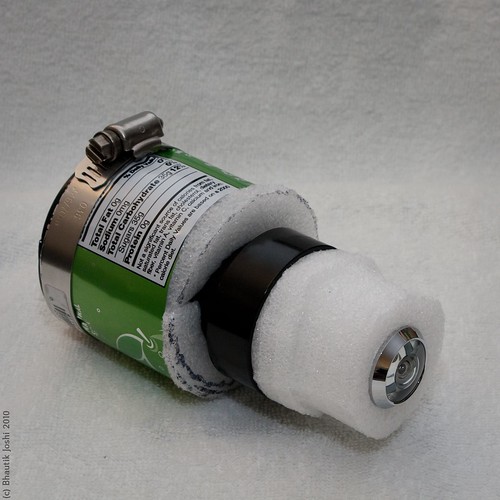
DIY tilt shift
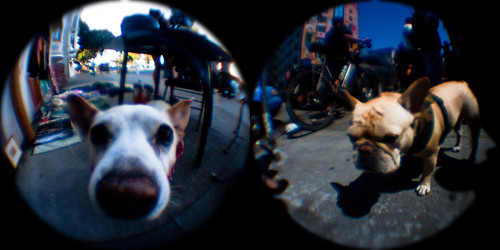
Back several years ago I saw one article about DIY Tilt shift. Since then I use it all the time. There was even one period I couldn't stop shoot like this. So that deffenetly deserve to be shared with you!
Example for tilt-shift from the article:
My way of doing tilt-shift - just take my lens, unmounted, put it in front of the camera and shoot when I see the focus. Of course that means different results. You can check up one of my favorite photos made like this.
Of course I'll try to make the tutorial of the articles and later I'll show you some results.
Good luck with DIY tilt-shift and I'd like to see some results!
Labels:
articles,
bokeh,
diy,
photography,
Portraits,
tilt-shift,
tutorial
Friday, March 1, 2013
How to resize your pictures tutorial
My friends are asking me often to resize their pictures and I understood that many people actually don't know how to resize their pictures.
So here we go, easy and short, two ways to do it.
First: How to resize a picture/photo in photoshop.
Open photoshop and your picture in photoshop.
Then click third menu, in english version is Image and then click image size
You have one menu to choose dimensions. You can choose the pixels, in the example the width is 1366 and right after there is drop down list. You can change pixels with percents for example. I'll give my example with pixels. If you are going to upload to a site, normally on the webpage there is indication, near upload/browse button, what's the maximum size for the picture. If you have 700 pixels maximum, that means on the longer side, in this case the width. You have to put 700 pixels where now is 1366.
Second: how to resize picture or photo without photoshop.
There is one great way to do it, free and online, at any time. You need only internet connection. Here is the site: http://www.resizeyourimage.com/
You have to upload the picture
Push zoom out button to make it small until you see the size you are looking for in width and height (right after zoom out button). If you need, you can crop the picture too. Then you push resize your image (yellow) button. And after several seconds you have resized picture.
I hope it was helful!
Enjoy
So here we go, easy and short, two ways to do it.
First: How to resize a picture/photo in photoshop.
Open photoshop and your picture in photoshop.
Then click third menu, in english version is Image and then click image size
You have one menu to choose dimensions. You can choose the pixels, in the example the width is 1366 and right after there is drop down list. You can change pixels with percents for example. I'll give my example with pixels. If you are going to upload to a site, normally on the webpage there is indication, near upload/browse button, what's the maximum size for the picture. If you have 700 pixels maximum, that means on the longer side, in this case the width. You have to put 700 pixels where now is 1366.
Second: how to resize picture or photo without photoshop.
There is one great way to do it, free and online, at any time. You need only internet connection. Here is the site: http://www.resizeyourimage.com/
You have to upload the picture
Push zoom out button to make it small until you see the size you are looking for in width and height (right after zoom out button). If you need, you can crop the picture too. Then you push resize your image (yellow) button. And after several seconds you have resized picture.
I hope it was helful!
Enjoy
Labels:
diy,
how to,
how to resize a photo,
photography,
tutorial
Saturday, February 23, 2013
Saturday, December 29, 2012
20 Creative DIY Project Ideas | Bored Panda
They are really creative and original. These are my favorite:
DIY Spoon Lamp
Turn a Glove into a Chipmunk
Plastic Spoon Rose
DIY TetraBox Lamp
Lightbulb Bud Vase
Subscribe to:
Posts (Atom)